How To Resize Pictures For Amazon?
How To Resize Pictures For Amazon? The Most Effective Ways!
Oh, don’t be annoyed by the restrictions Amazon imposes when it comes to uploading photos. They do this just to ensure that- you’ve selected the right image and that it attracts the audience efficiently.
That’s why you need to crop and resize it.
Most of the time it’s either square or rectangle. Depending on the object, you decide the shape of the frame. And even that has a specific perimeter for the same reason.
Just imagine yourself as a visitor! You will mostly prefer getting an entire view of the product from the thumbnail, right? Hence, the pre-uploading steps.
But what if you don’t know how to resize pictures for amazon?
No worries! We have made instruction easier so you get it properly. Before starting, we suggest you install Photoshop and we will tell you why!
Amazon Picture Requirements
Amazon has got a bunch of requirements. Follow them to the core and see how easily they accept all the pictures.
Let’s see what are those-

Producing resize images your products thats increase sells 20% more!
Correct Picture
The object must occupy at least 85% of the frame. Make sure the background of your main image is pure white, i.e., the RGB should be 255 on the color wheel. This will help eliminate extra efforts while you resize. Also, it should have smooth edges and shouldn’t contain unnecessary stuff like confusing graphics, texts, and watermarks.Image Quality And Ratio
Use a picture with maximum dimensions, to begin with. Because going down from the bigger size doesn’t sacrifice the quality as the opposite one does.Keep the ratio 1:1 to get a square image or 1:1.5 to get a rectangle.Amazon gives you a range of 500px to 10,000px for a single side. Since it’s pretty broad, they suggest using 1000 to 3000px or higher for height and width.It makes the dimensions optimized and enables maximum zooming to get a close-up view of the product. Plus, the photo quality remains unaffected even if you zoom.File Size And Resolution
The maximum size is up to 10 MB for each and the resolution has to be from 72 to 300 dpi.Image Format
Amazon may accept JPEG, GIF, and TIFF, but we suggest using the former since it’s easier to work with.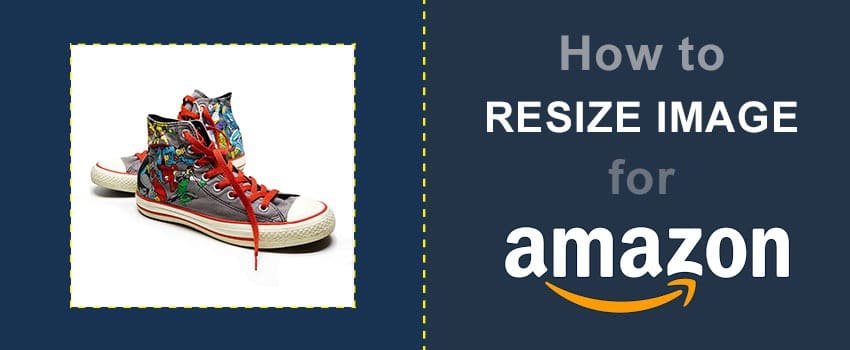
How To Resize Amazon Pictures In Photoshop
Why do we say it’s easy? Because you can do it in just two to three steps!
Step 1(a)
Open the image in Photoshop and crop it accordingly to get a proper frame.
For this, click on the tool from the box shown on the left. This will make the top bar appear with the cropping ratio and resolutions.
From there, set the dimensions to adjust the image for Amazon. If it isn’t square, then do the following.
Add the minimum value 1000px to the boxes of height and width on top.
If you think that it doesn’t fit the entire product inside the square frame, then change the size of your crop. The box will sustain the ratio to let you do that.
Just hold the left side of the mouse and drag any corner to a point where the object can be seen properly. Move the crop box and set the image to the center.
As you double-click- it’ll make the image bigger with additional background. If it’s transparent, then we suggest you make it white.
For this, set the foreground color to “White”. Use the “Paint Bucket” tool and click on the transparent or white background.
You can also use the “Clone Stamp” or “Healing Brush” tool to blend the visible lining with the “Alt” keyboard.
Step 1 (b)
You can also resize it by going to the “File” option, then to the tab “Image”. Click on “Image Size”.
A window will open showing you its current size details. If it’s bigger or smaller than the recommended range, then insert the values that will be best for it.
Step 2
Now, save the image by going to the “File” tab. Select “Save As”.
When the window appears, choose the file format. We suggest you pick JPEG. You can also rename the file from there.
Other Apps Or Software
Photoshop has different features to edit and adjust a picture. Hence, it’s considered one of the most useful options.
However, it’s okay if you don’t have it. Most photo editing software can do the same with ease.
Just make sure the tool has the necessary features to adjust accordingly.
Let’s add some more cool options to consider.
- Lightroom, although paid, has different editing and resizing features.
- You can use basic paint or crop tool on your computer.
- For online, BeFunky or Internet marketing ninjas would be quite suitable.
- You can also install software like Photoscape or Picasa for the computer.
- An app like Snapseed is useful as well for Apple or Android
We suggest you play around with the one you picked and it’ll be easier to get how to do the job.
Final Words
Hope now you know how to resize pictures for Amazon!
Once you get the proper frame and size of the image, there’s no way of rejection. You just need to follow both technical and standard requirements. Make sure you use the right photo showing the exact product with the background being pure white. Choose a high-quality one so that zooming doesn’t cause distortion.
Take pictures of the object from different angles. Amazon allows for up to 6 extra images minus the main for each product. Keep in mind that the object fills up to 85% of the space.
These tricks will help you optimize your clicked photo.